
I’am excited to introduce our new Image Generation feature in ActiveMerge — a powerful way to bulk generate images. You can create tens or even hundreds of images from a simple image template and a source file.
If you’ve used our document generation (PDF, Word, PowerPoint) tool, you’ll feel right at home. The workflow is almost identical — but now, instead of generating documents, you can generate fully customized images at scale.
Let’s walk through how it works.
Step 1: Start with a Source File
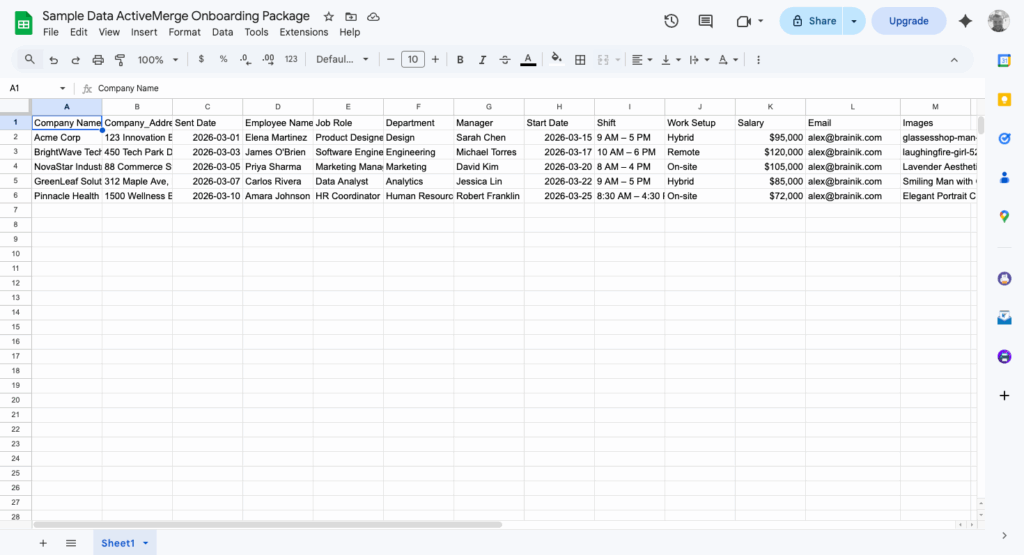
Just like document generation, everything begins with your data source. In this demo, we’re using a simple Excel file containing headers such as:
company_name
employee_name
date
These headers will act as placeholders inside our image template.
Step 2: Upload Your Image Template
Next, upload your base image.
In this example, we’re using a badge template. You can create a badge like this in Canva, or even in Google Slides.
The goal is to automatically generate personalized badges that include:
Company Name
Employee Name
(Optional) Date
Once the image is uploaded, you can start placing placeholders.
![]()
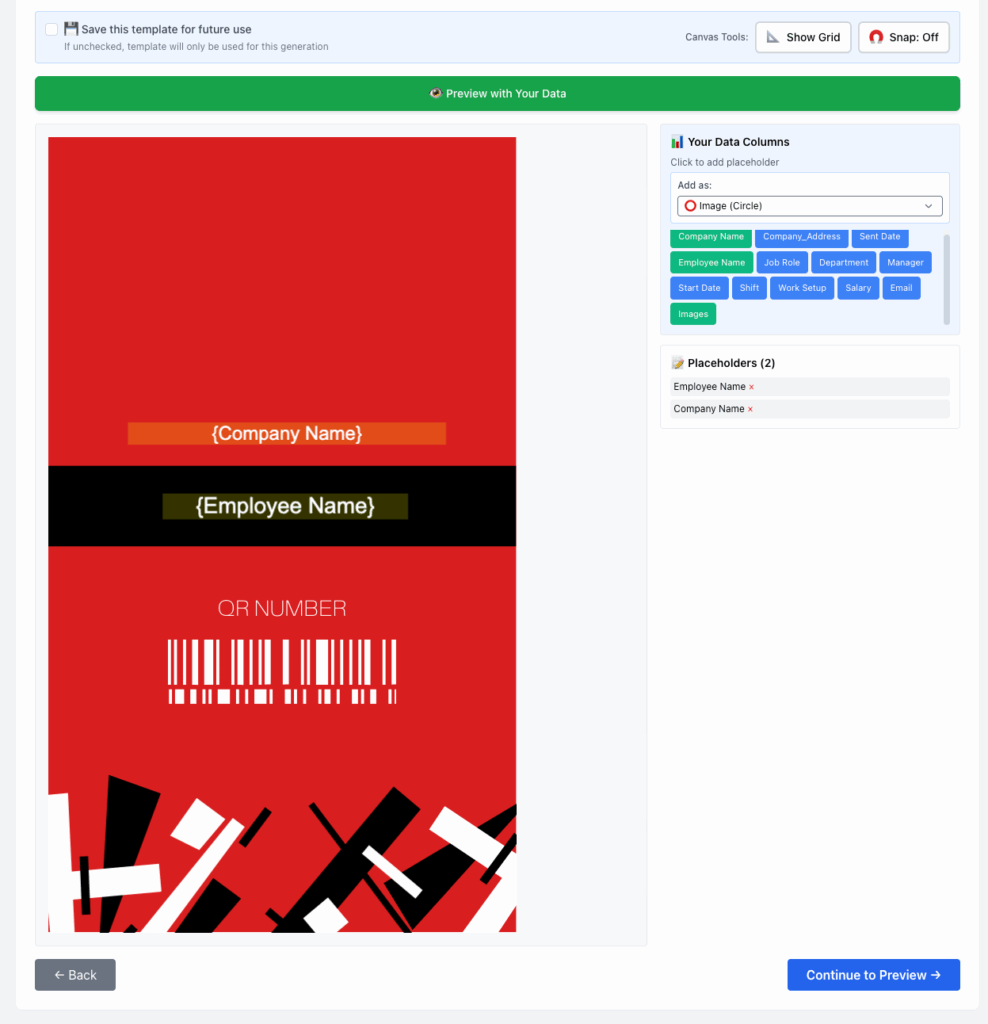
Step 3: Add and Style Placeholders
We insert placeholders using the headers from our source file. For example:
Add company_name
Add employee_name
You can fully customize the appearance:
- Choose from available fonts
- Center-align the text
- Adjust font size
- Change text color (for example, white for better contrast)
- Resize the placeholder area to accommodate longer names
???? Pro Tip: Make your placeholders slightly wider than needed. Some company names or employee names might be longer, and this ensures everything fits nicely.
Use the Grid for Perfect Alignment
A very useful feature is the built-in grid overlay. The grid splits your image into sections and provides alignment guides, helping you:
- Center text perfectly
- Maintain consistent spacing
- Place placeholders accurately
This makes designing clean, professional templates much easier.
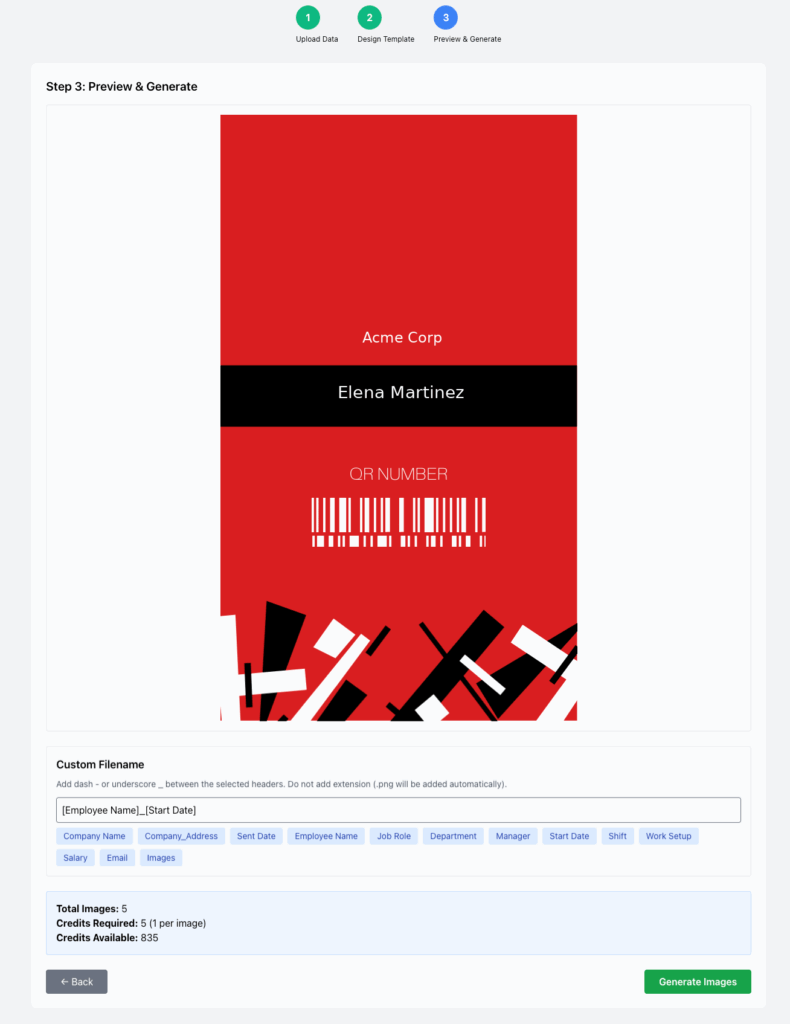
Step 4: Preview with Real Data
Before generating hundreds of images, you can preview your template using actual data.
For example:
- Company: A Corp
- Employee: Elena Martinez
This lets you verify:
- Text positioning
- Font sizing
- Spacing
- Overall visual balance
Step 5: Bulk Generate Images
Once everything looks good:
Confirm the generation and start the process. In the demo, it only took a few seconds to generate a handful of images. For larger batches, it may take slightly longer — but the system is optimized for bulk processing.
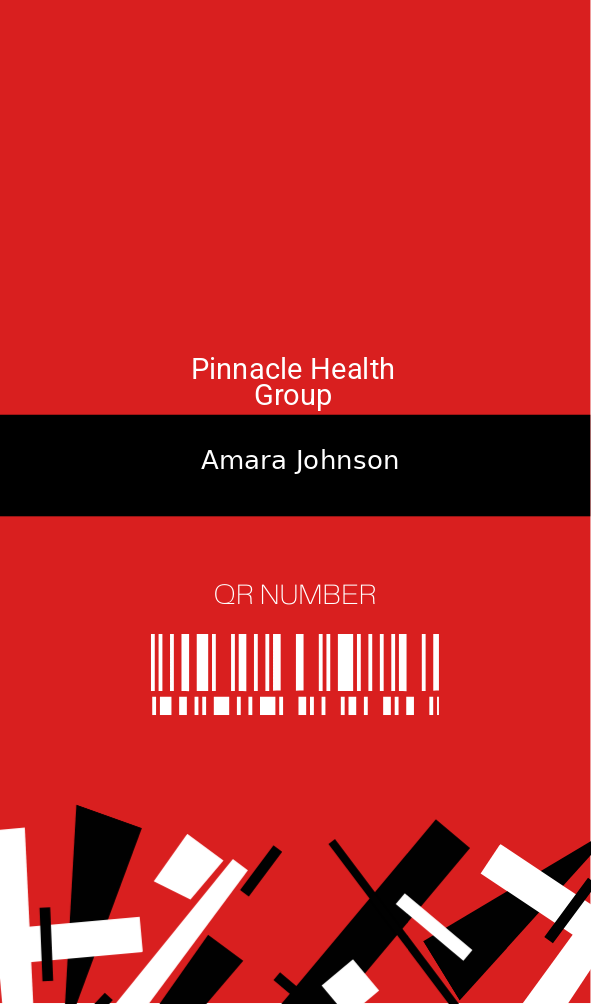
And just like that, your personalized images are ready.
Demo Result:
Save Templates for Future Use
One of the most powerful features is the ability to save your image as a reusable template.
You can:
- Name your template
- Store it for future use
Generate new image batches instantly with different data from a data source or use the API with our integrations.
This is perfect for:
- Employee badges
- Certificates
- Event passes
- Promotional graphics
- Custom marketing visuals
API Integration
Just like our document generation system, image generation is also available via API integration.
That means you can:
- Automate image creation
- Connect it to your internal systems
- Integrate with CRMs, forms, or other data sources
- Generate images programmatically at scale
Now you’re not limited to generating PDFs, Word documents, or PowerPoint presentations — you can generate dynamic images too.
What’s Next?
We will soon update our current integrations, and you will be able to generate images from your favorite tools.

